Achieve some team tasks in Phase 1. Decide on a overall project direction. Document the requirements of Phase 2.
Here is a summary of items you need to deliver to reach v1.0 individual () and team () milestones. See sections below for more details of each item.
| Milestone |
Minimum acceptable performance to consider as 'reached' |
| Complete the Duke increments specified |
Tag and push the commits to your own fork as per the instructions |
| Complete the team tasks as specified, including the Duke increments |
Tag the relevant commit and push to your team fork |
| Decide on a overall project direction |
Document the user profile, problem addressed, societal impact, optimize or morph in the developer guide (Introduction) |
| Decide on requirements of Phase 2 |
Document the user stories, use cases, non-functional requirements in the developer guide (as Appendix A) |
| [optional] Product survey documented |
none |
Duke tasks ( individual)
Implement the following increments while committing code incrementally
Try to use a branch-frequent-merge-frequent (i.e., Create a branch for each increment and merge to your master after the completing the task.) approach while implementing these increments. Reason: to learn effective use of branches in the development cycle.
As earlier, push these changes to your own fork of Duke.
- Write some unit tests using Junit
- Note that you are still not required to incorporate Gradle in your work
A-JUnit: JUnit Testing
A-JUnit
↳ Add JUnit tests
Add JUnit tests to test the behavior of the code.
Notes:
- Add test code in a folder named
[project root]\src\test\java\ folder (reason: to follow the convention followed by the project structure so far).
- Name the test class to match the class being tested (
Todo.java can be tested by TodoTest.java), and put it in a package to match. For example,
- Class being tested
seedu.duke.Todo: src\main\java\seedu\duke\Todo.java
- Test class
seedu.duke.TodoTest: src\test\java\seedu\duke\TodoTest.java
Adding JUnit support to your project: As JUnit is a third-party library, you need to add support to it specifically in your project.
- Add a folder named
[project root]\src\test\java\ (you may have to do this outside of Intellij)
- Go to Intellij and add a new module to the project as follows.
File → New → Module From Existing Sources ...- Choose the
[project root]\src\test\ (not the java) folder.
- In the next screen, select
Create module from existing sources
- Keep clicking
Next until the process is complete
- In the
Project panel of Intellij, expand the newly-created test module, right-click on the java folder inside it, and choose Mark Directory as → Test Source Root (that will make the folder turn to green color).
- Now, create a class inside the
java folder and type @Test inside it. Example:
public class DukeTest {
    @Test
}
- Note how the
@Test turn to red because Intellij (not having JUnit support yet) does not understand it. But it will pop up a hint, asking if you want to add support for JUnit. Select Add JUnit 5.* to classpath.
- In the dialog that pops up, you can optionally tick the
Sources, JavaDocs and Annotations boxes. After that, click OK to add the JUnit 5 to the project dependencies.
- To check if JUnit integration is working as expected,
- Add a dummy test method to the class e.g.,
import org.junit.jupiter.api.Test;

import static org.junit.jupiter.api.Assertions.assertEquals;

public class DukeTest {
    @Test
    public void dummyTest(){
        assertEquals(2, 2);
    }
}
- Run the test (right-click on the class and choose
Run DukeTest.
Refer to the Gradle tutorial at the Duke repo (i.e., the repo you forked from) to find how to use JUnit via Gradle.
A-Gradle
↳ Automate project builds using Gradle
Use Gradle to automate some of the build tasks of the project. Refer to the Gradle tutorial at the Duke repo (i.e., the repo you forked from) to find how to set up Gradle for your project.
- Minimal: Learn how to use Gradle when it is already set up.
- Recommended: Learn how to tweak the Gradle gradle set up of for a project.
- Stretch Goal: Learn how to set up Gradle for a project.
- Document your code appropriately
A-JavaDoc: JavaDoc
A-JavaDoc
↳ Add JavaDoc comments
Add JavaDoc comments to the code.
Duke tasks ( team)
Project Setup
Create your team organization.
Relevant: [Admin Appendix E(extract): Organization setup ]
Organization setup
Please follow the organization/repo name format precisely because we use scripts to download your code or else our scripts will not be able to detect your work.
After receiving your team ID, one team member should do the following steps:
- Create a GitHub organization with the following details:
- Organization name :
SEMESTER-TEAM_ID. e.g. AY1920S1-CS2113T-W12-2 or AY1920S1-CS2113-T13-1
- Plan: Open Source ($0/month)
- Add members to the organization:
- Create a team called
developers to your organization.
- Add your team members to the developers team.
Set up the team repo
Relevant: [Admin Appendix E(extract): Repo setup ]
Repo setup
Only one team member:
- Fork nuscs2113-AY1920S1/PersonalAssistant-Duke to your team org.
- Rename the forked repo as
main. This repo (let's call it the team repo) is to be used as the repo for your project.
- Ensure the issue tracker of your team repo is enabled. Reason: our bots will be posting your weekly progress reports on the issue tracker of your team repo.
- Ensure your team members have the desired level of access to your team repo.
- create a team PR for us to track your project progress: i.e., create a PR from your team repo
master branch to [nuscs2113-AY1920S1/PersonalAssistant-Duke] master branch. PR name: [Team ID] Product Name e.g., [AY1920S1-CS2113-T13-1] Contact List Pro. As you merge code to your team repo's master branch, this PR will auto-update to reflect how much your team's product has progressed. In the PR description @mention the other team members so that they get notified when the tutor adds comments to the PR.
All team members:
- Watchthe
main repo (created above) i.e., go to the repo and click on the watch button to subscribe to activities of the repo
- Fork the
main repo to your personal GitHub account.
- Clone the fork to your Computer.
- Recommended: Set it up as an Intellij project.
Note that some of our download scripts depend on the following folder paths. Please set up the these paths in your project carefully.
/src/main/src/test/docs
Setup the issue tracker in the team repo
Relevant: [Admin Appendix E(extract): Issue tracker setup ]
Issue tracker setup
We recommend you configure the issue tracker of the main repo as follows:
- Delete existing labels and add the following labels.
💡 Issue type labels are useful from the beginning of the project. The other labels are needed only when you start implementing the features.
Issue type labels:
type.Epic : A big feature which can be broken down into smaller stories e.g. searchtype.Story : A user storytype.Enhancement: An enhancement to an existing storytype.Task : Something that needs to be done, but not a story, bug, or an epic. e.g. Move testing code into a new folder)type.Bug : A bug
Status labels:
status.Ongoing : The issue is currently being worked on. note: remove this label before closing an issue.
Priority labels:
priority.High : Must dopriority.Medium : Nice to havepriority.Low : Unlikely to do
Bug Severity labels:
severity.Low : A flaw that is unlikely to affect normal operations of the product. Appears only in very rare situations and causes a minor inconvenience only.severity.Medium : A flaw that causes occasional inconvenience to some users but they can continue to use the product.severity.High : A flaw that affects most users and causes major problems for users. i.e., makes the product almost unusable for most users.
-
Create following milestones : v1.0, v1.1, v1.2, v1.3, v1.4,
-
You may configure other project settings as you wish. e.g. more labels, more milestones
Port the phase 1 code to your team repo
- Now carefully port the phase 1 code to the team repo you setup above.
- (Caution!) This can be messy.
- You are allowed to decide and choose which team member's code goes into the team repo. There can be various combinations.
- E.g., Codebase for different purposes (interaction, storage to file, logic, etc.,) can belong to different team members.
- E.g., Entire codebase from Phase 1 can belong to just one or two team members.
- However, the decision on whose code is used should be made collectively within the team, the teaching team will not intervene.
- In the interest of the team, you can choose the best code to be the starter codebase.
- Note: You will be graded individually for your Phase 1 of the project, so irrespective of your code being used or not used as the base code for the team project, you will have received the due credit for your work. Conversely, since your work is evaluated in Phase 1, you will not receive any additional credits if your code is used as the base code for the team project.
- Push the changes to the team repo.
## Implement the following increments in the team repo
A-Packages: Java Packages
A-Packages
↳ Divide classes into packages
Organize the classes into suitable java packages. e.g., duke.task, duke.command
- After the above increment is completed, tag your codebase with
v1.0.
Project Phase 2
-
Step 0 : Identify the target user profile and the problem you are solving for the target users
Decide on the project direction (e.g., enhance or morph?)
Document these details in the introduction section of your developer guide.
-
Step 1 : Brainstorm user stories
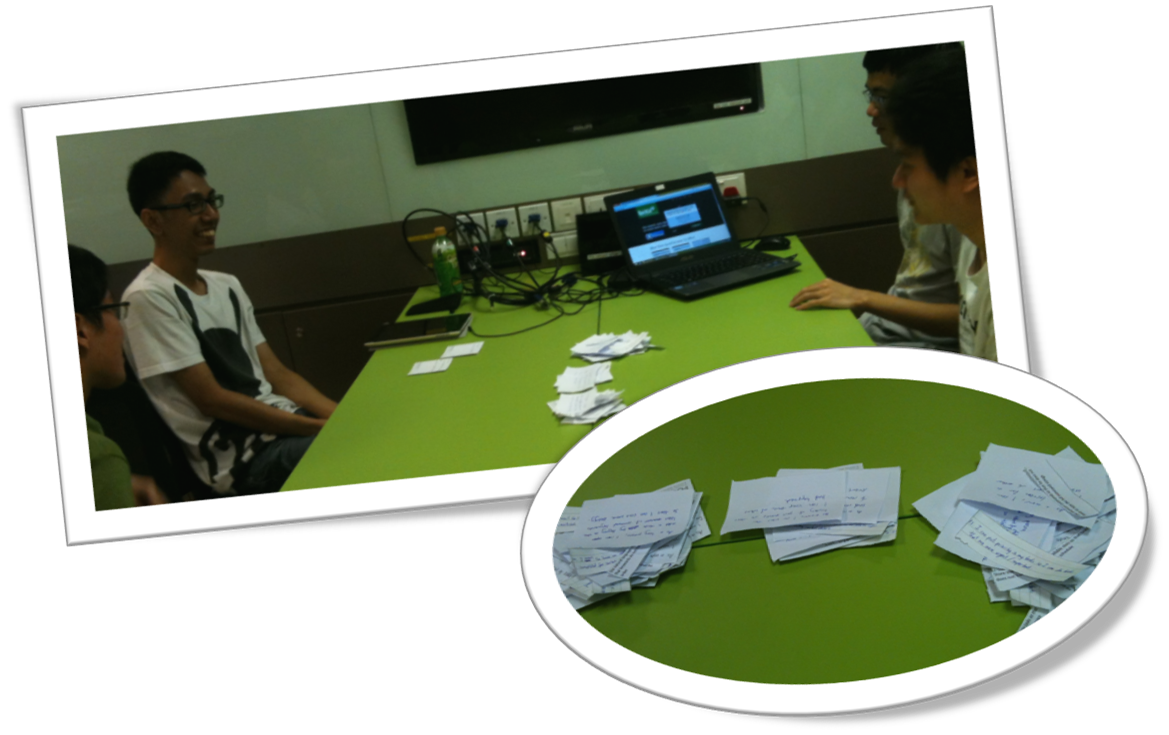
This is a good time to analyze requirements with a view to conceptualizing the next version of the product (i.e. v2.0).
Get together with your team members and brainstorm for user stories for the v2.0 of the product. Note that in the module project you will deliver only up to v1.4 but here you should consider up to v2.0 (i.e. beyond the module).
-
It is ok to have more user stories than you can deliver in the project. Aim to create at least 30 user stories. Include all 'obvious' ones you can think of but also look for 'non obvious' ones that you think are likely to be missed by other teams.
-
Refer [Textbook Specifying Requirements → UserStories → Usage → (section) Tips] for tips on how to use user stories in this task.
-
You can write each user story in a piece of paper (e.g. yellow sticky note, index card, or just pieces of paper about the size of a playing card). Alternatively you can use an online tool (some examples given in [Textbook Specifying Requirements → UserStories → Usage → (panel) Tool Examples ]).
-
Note that you should not 'evaluate' the value of user stories while doing the above. Reason: an important aspect of brainstorming is not judging the ideas generated.
Requirements → Gathering Requirements →
Brainstorming: A group activity designed to generate a large number of diverse and creative ideas for the solution of a problem.
In a brainstorming session there are no "bad" ideas. The aim is to generate ideas; not to validate them. Brainstorming encourages you to "think outside the box" and put "crazy" ideas on the table without fear of rejection.
What is the key characteristic about brainstorming?
Requirements → Specifying Requirements → User Stories →
User story: User stories are short, simple descriptions of a feature told from the perspective of the person who desires the new capability, usually a user or customer of the system. [Mike Cohn]
A common format for writing user stories is:
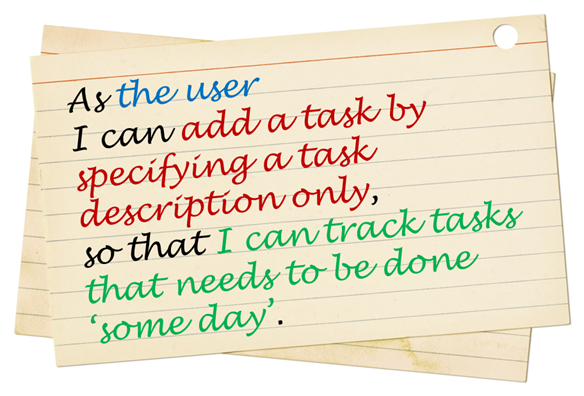
User story format: As a {user type/role} I can {function} so that {benefit}
Examples (from a Learning Management System):
- As a student, I can download files uploaded by lecturers, so that I can get my own copy of the files
- As a lecturer, I can create discussion forums, so that students can discuss things online
- As a tutor, I can print attendance sheets, so that I can take attendance during the class
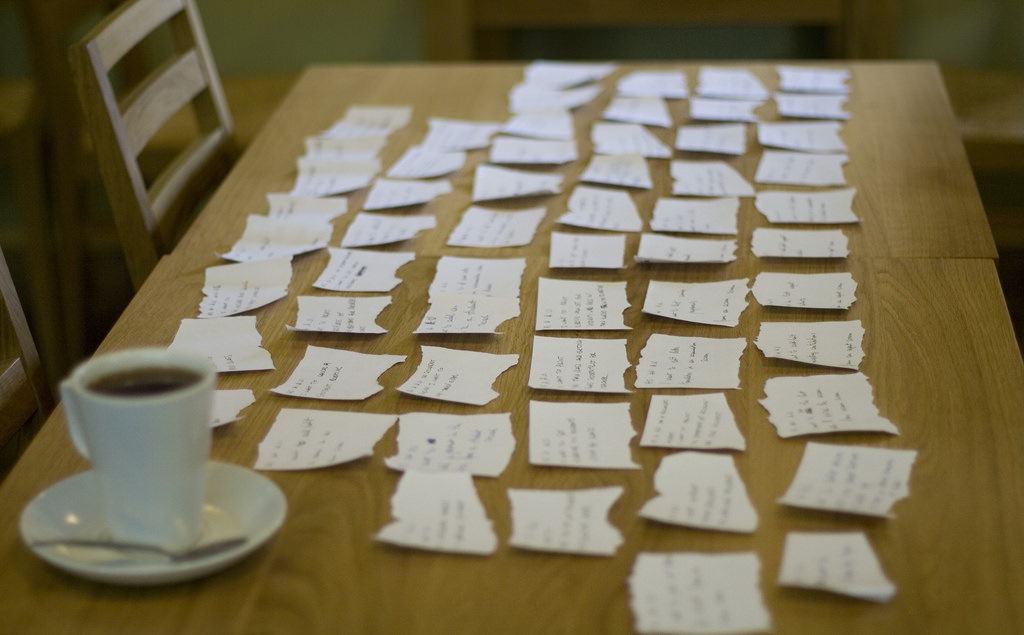
We can write user stories on index cards or sticky notes, and arrange on walls or tables, to facilitate planning and discussion. Alternatively, we can use a software (e.g., GitHub Project Boards, Trello, Google Docs, ...) to manage user stories digitally.

[credit: https://www.flickr.com/photos/jakuza/2682466984/]
[credit: https://www.flickr.com/photos/jakuza/with/2726048607/]
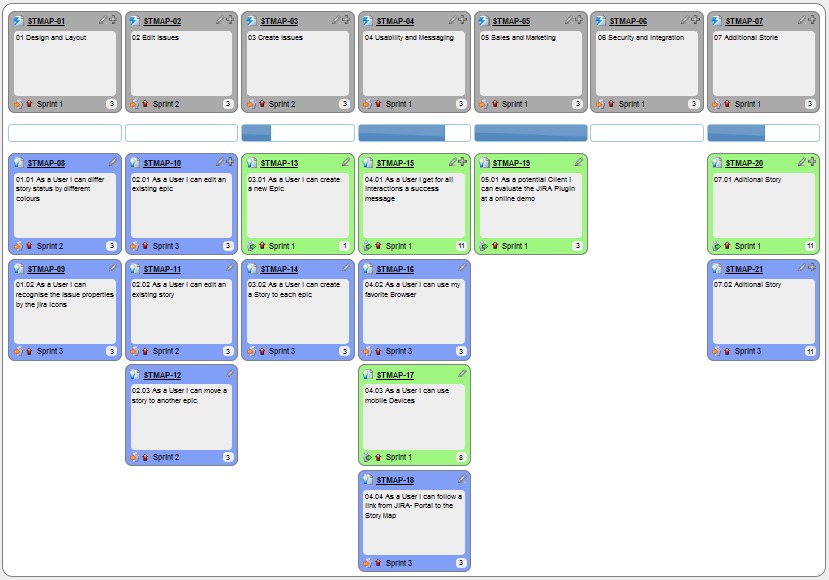
[credit: https://commons.wikimedia.org/wiki/File:User_Story_Map_in_Action.png]
Critique the following user story taken from a software project to build an e-commerce website.
As a developer, I want to use Python to implement the software, so that we can resue existing Python modules.
Refer to the definition of a user story.
User story: User stories are short, simple descriptions of a feature told from the perspective of the person who desires the new capability, usually a user or customer of the system. [Mike Cohn]
This user story is not written from the perspective of the user/customer.
Bill wants you to build a Human Resource Management (HRM) system. He mentions that the system will help employees to view their own leave balance. What are the user stories you can extract from that statement?
Remember to follow the correct format when writing user stories.
User story format: As a {user type/role} I can {function} so that {benefit}
As an employee, I can view my leave balance, so that I can know how many leave days I have left.
Note: the {benefit} part may vary as it is not specifically mentioned in the question.
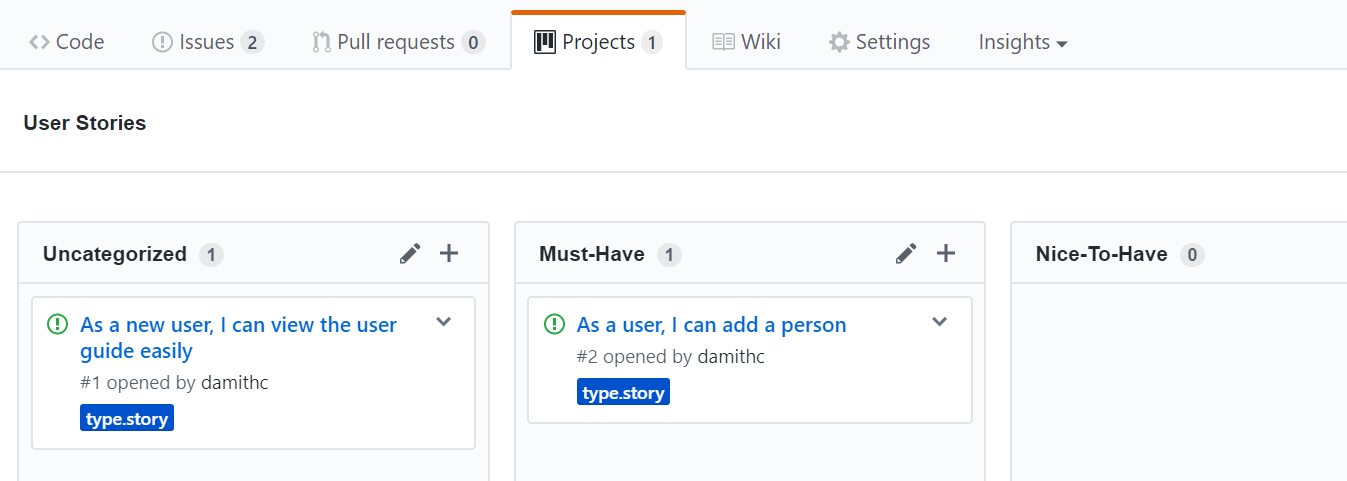
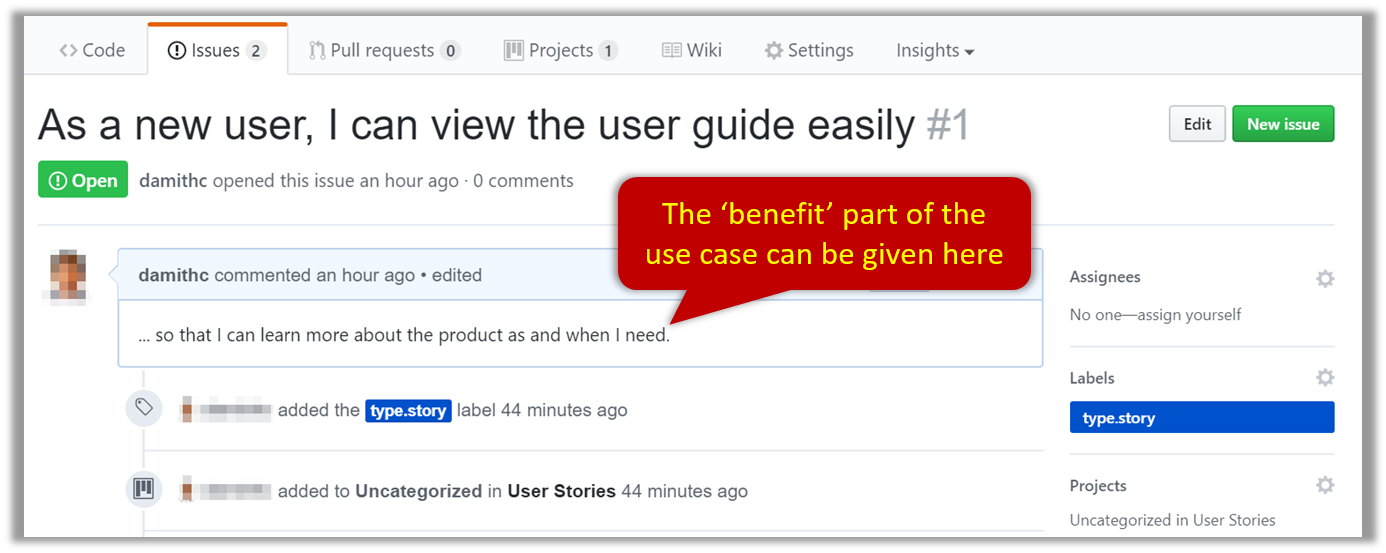
You can create issues for each of the user stories and use a GitHub Project Board to sort them into categories.
Example Project Board:
Example Issue to represent a user story:
A video on GitHub Project Boards:
Example Google Sheet for recording user stories:

Example Trello Board for recording user stories:

Given their lightweight nature, user stories are quite handy for recording requirements during early stages of requirements gathering.
Here are some tips for using user stories for early stages of requirement gathering:
- Define the target user:
Decide your target user's profile (e.g. a student, office worker, programmer, sales person) and work patterns (e.g. Does he work in groups or alone? Does he share his computer with others?). A clear understanding of the target user will help when deciding the importance of a user story. You can even give this user a name. e.g. Target user Jean is a university student studying in a non-IT field. She interacts with a lot of people due to her involvement in university clubs/societies. ...
- Define the problem scope:
Decide that exact problem you are going to solve for the target user. e.g. Help Jean keep track of all her school contacts
- Don't be too hasty to discard 'unusual' user stories:
Those might make your product unique and stand out from the rest, at least for the target users.
- Don't go into too much details:
For example, consider this user story: As a user, I want to see a list of tasks that needs my attention most at the present time, so that I pay attention to them first.
When discussing this user story, don't worry about what tasks should be considered needs my attention most at the present time. Those details can be worked out later.
- Don't be biased by preconceived product ideas:
When you are at the stage of identifying user needs, clear your mind of ideas you have about what your end product will look like.
- Don't discuss implementation details or whether you are actually going to implement it:
When gathering requirements, your decision is whether the user's need is important enough for you to want to fulfil it. Implementation details can be discussed later. If a user story turns out to be too difficult to implement later, you can always omit it from the implementation plan.
Requirements → Specifying Requirements → Use Cases →
Use Case: A description of a set of sequences of actions, including variants, that a system performs to yield an observable result of value to an actor.[ 📖 : uml-user-guideThe Unified Modeling Language User Guide, 2e, G Booch, J Rumbaugh, and I Jacobson ]
Actor: An actor (in a use case) is a role played by a user. An actor can be a human or another system. Actors are not part of the system; they reside outside the system.
A use case describes an interaction between the user and the system for a specific functionality of the system.
- System:
ATM
- Actor: Customer
- Use Case: Check account balance
- User inserts an ATM card
- ATM prompts for PIN
- User enters PIN
- ATM prompts for withdrawal amount
- User enters the amount
- ATM ejects the ATM card and issues cash
- User collects the card and the cash.
- System: A Learning Management System (LMS)
- Actor: Student
- Use Case: Upload file
- Student requests to upload file
- LMS requests for the file location
- Student specifies the file location
- LMS uploads the file
UML includes a diagram type called use case diagrams that can illustrate use cases of a system visually
, providing a visual ‘table of contents’ of the use cases of a system. In the example below, note how use cases are shown as ovals and user roles relevant to each use case are shown as stick figures connected to the corresponding ovals.
Unified Modeling Language (UML) is a graphical notation to describe various aspects of a software system. UML is the brainchild of three software modeling specialists James Rumbaugh, Grady Booch and Ivar Jacobson (also known as the Three Amigos). Each of them has developed their own notation for modeling software systems before joining force to create a unified modeling language (hence, the term ‘Unified’ in UML). UML is currently the de facto modeling notation used in the software industry.
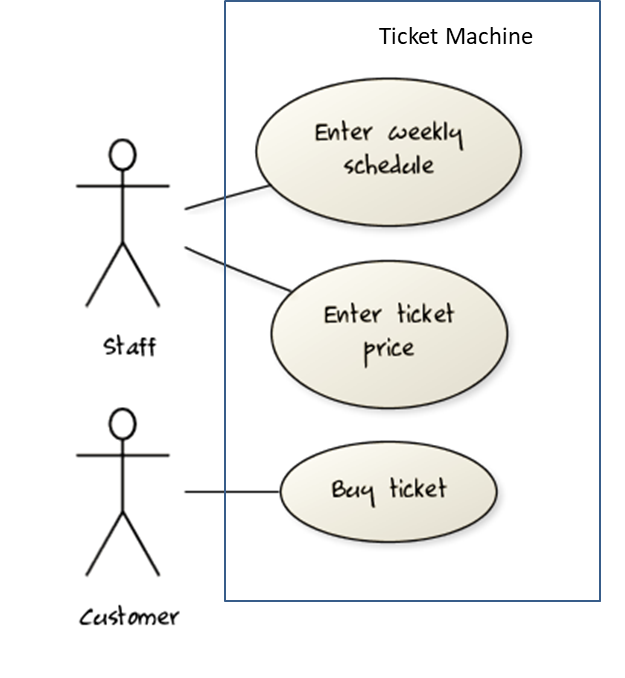
Use cases capture the functional requirements of a system.
Requirements → Requirements →
Non-Functional Requirements
Requirements can be divided into two in the following way:
- Functional requirements specify what the system should do.
- Non-functional requirements specify the constraints under which system is developed and operated.
Some examples of non-functional requirement categories:
- Data requirements e.g. size, volatility, persistency etc.,
- Environment requirements e.g. technical environment in which system would operate or need to be compatible with.
- Accessibility, Capacity, Compliance with regulations, Documentation, Disaster recovery, Efficiency, Extensibility, Fault tolerance, Interoperability, Maintainability, Privacy, Portability, Quality, Reliability, Response time, Robustness, Scalability, Security, Stability, Testability, and more ...
- Business/domain rules: e.g. the size of the minefield cannot be smaller than five.
- Constraints: e.g. the system should be backward compatible with data produced by earlier versions of the system; system testers are available only during the last month of the project; the total project cost should not exceed $1.5 million.
- Technical requirements: e.g. the system should work on both 32-bit and 64-bit environments.
- Performance requirements: e.g. the system should respond within two seconds.
- Quality requirements: e.g. the system should be usable by a novice who has never carried out an online purchase.
- Process requirements: e.g. the project is expected to adhere to a schedule that delivers a feature set every one month.
- Notes about project scope: e.g. the product is not required to handle the printing of reports.
- Any other noteworthy points: e.g. the game should not use images deemed offensive to those injured in real mine clearing activities.
We may have to spend an extra effort in digging NFRs out as early as possible because,
- NFRs are easier to miss e.g., stakeholders tend to think of functional requirements first
- sometimes NFRs are critical to the success of the software. E.g. A web application that is too slow or that has low security is unlikely to succeed even if it has all the right functionality.
Given below are some requirements of TEAMMATES (an online peer evaluation system for education). Which one of these are non-functional requirements?
(a)(c)(d)(f)(g)
Explanation: (b) are (e) are functions available for a specific user types. Therefore, they are functional requirements. (a), (c), (d), (f) and (g) are either constraints on functionality or constraints on how the project is done, both of which are considered non-functional requirements.
Requirements → Specifying Requirements → Glossary →
Glossary: A glossary serves to ensure that all stakeholders have a common understanding of the noteworthy terms, abbreviation, acronyms etc.
Here is a partial glossary from a variant of the Snakes and Ladders game:
- Conditional square: A square that specifies a specific face value which a player has to throw before his/her piece can leave the square.
- Normal square: a normal square does not have any conditions, snakes, or ladders in it.
Requirements → Gathering Requirements →
Studying existing products can unearth shortcomings of existing solutions that can be addressed by a new product. Product manuals and other forms of documentation of an existing system can tell us how the existing solutions work.
When developing a game for a mobile device, a look at a similar PC game can give insight into the kind of features and interactions the mobile game can offer.


