Continue to code in the team repo. Do local-impact changes to the code base. Submit UG for review.
Milestone progress is graded. Be reminded that reaching individual and team milestones are considered for grading the project management component of your project grade.
Most aspects project progress are tracked using automated scripts. Please follow our instructions closely or else the script will not be able to detect your progress. We prefer not to spend admin resources processing requests for partial credit for work that did not follow the instructions precisely, unless the progress was not detected due to a bug in the script.
Milestone requirements are cumulative. The recommended progress for the mid-milestone is an implicit requirement for the actual milestone unless a milestone requirement overrides a mid-milestone requirement e.g., mid-milestone requires a document to be in a temp format while the actual milestone requires it to be in the proper format. Similarly, a requirement for milestone n is also an implicit requirement for milestone n+1 unless n+1 overrides the n requirement. This means if you miss some requirement at milestone n, you should try to achieve it before milestone n+1 or else it could be noted again as a 'missed requirement' at milestone n+1.
Deadline. As all other things so far, the deadline for achieving the milestones is the midnight before your tutorial. (E.g., Wednesday teams should complete the milestone by Tuesday 2359 hrs).
v1.1 Summary
| Milestone |
Minimum acceptable performance to consider as 'reached' |
| Team org/repo set up |
as stated in Week 5
|
| Some code enhancements done |
created PRs to do local/global changes |
| Photo uploaded |
a photo complying to our guidelines is in the master branch of your team repo |
| Project docs updated |
updated docs (README and AboutUs) are merged to the master branch |
| Project docs submitted |
User guide and developer guide are submitted on LumiNUS |
| Milestone wrapped up |
a commit in the master branch tagged as v1.1; milestone closed on GitHub |
Project Setup
Create your team organization.
Relevant: [Admin Appendix E(extract): Organization setup ]
Organization setup
Please follow the organization/repo name format precisely because we use scripts to download your code or else our scripts will not be able to detect your work.
After receiving your team ID, one team member should do the following steps:
- Create a GitHub organization with the following details:
- Organization name :
SEMESTER-TEAM_ID. e.g. AY1920S1-CS2113T-W12-2 or AY1920S1-CS2113-T13-1
- Plan: Open Source ($0/month)
- Add members to the organization:
- Create a team called
developers to your organization.
- Add your team members to the developers team.
Set up the team repo
Relevant: [Admin Appendix E(extract): Repo setup ]
Repo setup
Only one team member:
- Fork nuscs2113-AY1920S1/PersonalAssistant-Duke to your team org.
- Rename the forked repo as
main. This repo (let's call it the team repo) is to be used as the repo for your project.
- Ensure the issue tracker of your team repo is enabled. Reason: our bots will be posting your weekly progress reports on the issue tracker of your team repo.
- Ensure your team members have the desired level of access to your team repo.
- create a team PR for us to track your project progress: i.e., create a PR from your team repo
master branch to [nuscs2113-AY1920S1/PersonalAssistant-Duke] master branch. PR name: [Team ID] Product Name e.g., [AY1920S1-CS2113-T13-1] Contact List Pro. As you merge code to your team repo's master branch, this PR will auto-update to reflect how much your team's product has progressed. In the PR description @mention the other team members so that they get notified when the tutor adds comments to the PR.
All team members:
- Watchthe
main repo (created above) i.e., go to the repo and click on the watch button to subscribe to activities of the repo
- Fork the
main repo to your personal GitHub account.
- Clone the fork to your Computer.
- Recommended: Set it up as an Intellij project.
Note that some of our download scripts depend on the following folder paths. Please set up the these paths in your project carefully.
/src/main/src/test/docs
Setup the issue tracker in the team repo
Relevant: [Admin Appendix E(extract): Issue tracker setup ]
Issue tracker setup
We recommend you configure the issue tracker of the main repo as follows:
- Delete existing labels and add the following labels.
💡 Issue type labels are useful from the beginning of the project. The other labels are needed only when you start implementing the features.
Issue type labels:
type.Epic : A big feature which can be broken down into smaller stories e.g. searchtype.Story : A user storytype.Enhancement: An enhancement to an existing storytype.Task : Something that needs to be done, but not a story, bug, or an epic. e.g. Move testing code into a new folder)type.Bug : A bug
Status labels:
status.Ongoing : The issue is currently being worked on. note: remove this label before closing an issue.
Priority labels:
priority.High : Must dopriority.Medium : Nice to havepriority.Low : Unlikely to do
Bug Severity labels:
severity.Low : A flaw that is unlikely to affect normal operations of the product. Appears only in very rare situations and causes a minor inconvenience only.severity.Medium : A flaw that causes occasional inconvenience to some users but they can continue to use the product.severity.High : A flaw that affects most users and causes major problems for users. i.e., makes the product almost unusable for most users.
-
Create following milestones : v1.0, v1.1, v1.2, v1.3, v1.4,
-
You may configure other project settings as you wish. e.g. more labels, more milestones
Port the phase 1 code to your team repo
- Now carefully port the phase 1 code to the team repo you setup above.
- (Caution!) This can be messy.
- You are allowed to decide and choose which team member's code goes into the team repo. There can be various combinations.
- E.g., Codebase for different purposes (interaction, storage to file, logic, etc.,) can belong to different team members.
- E.g., Entire codebase from Phase 1 can belong to just one or two team members.
- However, the decision on whose code is used should be made collectively within the team, the teaching team will not intervene.
- In the interest of the team, you can choose the best code to be the starter codebase.
- Note: You will be graded individually for your Phase 1 of the project, so irrespective of your code being used or not used as the base code for the team project, you will have received the due credit for your work. Conversely, since your work is evaluated in Phase 1, you will not receive any additional credits if your code is used as the base code for the team project.
- Push the changes to the team repo.
A. Process:
Evaluates: How well you did in project management related aspects of the project, as an individual and as a team
Based on: Supervisor observations of project milestones and GitHub data.
Milestones need to be reached the midnight before of the tutorial for it to be counted as achieved. To get a good grade for this aspect, achieve at least 60% of the recommended milestone progress.
Other criteria:
- Good use of GitHub milestones
- Good use of GitHub release mechanism
- Good version control, based on the repo
- Reasonable attempt to use the forking workflow
- Good task definition, assignment and tracking, based on the issue tracker
- Good use of buffers (opposite: everything at the last minute)
- Project done iteratively and incrementally (opposite: doing most of the work in one big burst)
B. Team-tasks:
Evaluates: How much did you contribute to team-tasks?
Based on: peer evaluations and tutor observations
Relevant: [Admin Project Scope → Examples of team-tasks ]
Here is a non-exhaustive list of team-tasks:
- Necessary general code enhancements e.g.,
- Work related to renaming the product
- Work related to changing the product icon
- Morphing the product into a different product
- Setting up the GitHub, Travis, AppVeyor, etc.
- Maintaining the issue tracker
- Release management
- Updating user/developer docs that are not specific to a feature e.g. documenting the target user profile
- Incorporating more useful tools/libraries/frameworks into the product or the project workflow (e.g. automate more aspects of the project workflow using a GitHub plugin)
-
The purpose of the profile photo is for the teaching team to identify you. Therefore, you should choose a recent individual photo showing your face clearly (i.e., not too small) -- somewhat similar to a passport photo. Some examples can be seen in the 'Teaching team' page. Given below are some examples of good and bad profile photos.

-
If you are uncomfortable posting your photo due to security reasons, you can post a lower resolution image so that it is hard for someone to misuse that image for fraudulent purposes. If you are concerned about privacy, you can request permission to omit your photo from the page by writing to prof.
v1.1 Project Management
- Fix any errors in org/repo set up (e.g. wrong repo name).
- Wrap up the milestone using a git tag
v1.1 as explained below:
- When the milestone deadline is near (e.g., 0.5 days before the deadline), if you think some of the ongoing work intended for the current milestone may not finish in time, reassign them to a future milestone.
- After all changes that can be merged before the milestone deadline has been merged, use
git tag feature to tag the current version with the milestone and push the tag to the team repo.
- Close the milestone on GitHub explicitly.
v1.1 Documentation
-
Update User Guide, Developer Guide, README, and About Us pages as described earlier in mid-v1.1 progress guide.
Submission:
- Submit two pdf files on LumiNUS, one for the user guide and the other for the developer guide.
- Please name the file using this format:
[Team id]-[Product name]-UG or [Team id]-[Product name]-DG and submit them on LumiNUS.
- The user guide should have the concrete command syntax and explanation for features that you would implement (in v1.4) and the features that are planned for v2.0
- The developer guide should have the user profile, value proposition and Appendix A containing user stories, use cases and NFR..
Documentation:
Recommended: Divide among yourselves who will update which parts of the document(s).
-
User Guide:
Start drafting a user guide in a convenient medium (e.g., a GoogleDoc) to describe what the product would be like when it is at v2.0. Which means, you can include commands that you may not implement in the project.
- We recommend that you follow the reference project's User Guide in terms of structure and format.
- As this is a beginning draft, don't waste time in formatting, copy editing, etc. It is fine as long as the tutor can get a rough idea of the features from this draft. You can also do just the 'Features' section and omit the other parts.
- However, do try to come up with concrete command syntax for feature that you would implement (at least for those that you will implement by v1.4).
- Include a mock-up of how your interface may look (e.g., either GUI or CLI landing screen). (GUI mock-up can be hand-drawn or created using a tool such as PowerPoint or Balsamiq).
-
Developer Guide:
Update the developer guide (target user profile, user stories, use cases, and non-functional requirements) based on the feedback from your tutors.
Admin pages:
Create/update the following pages in your project repo:
- Create the About Us page:
Use this page from the reference project as a reference for the format.
We need this page for module admin purposes. Please follow the format closely or else our scripts will not be able to give credit for your work.
- You may copy the page and replace info of SE-EDU developers with info of your team, including a suitable photo as described here.
- Including the name/photo of the supervisor/lecturer is optional.
- The photo of a team member should be
docs/images/githbub_username_in_lower_case.png e.g. docs/images/johndoe.png. If you photo is in jpg format, name the file as .png anyway.
- Indicate the different roles played and responsibilities held by each team member. You can reassign these roles and responsibilities (as explained in Admin Project Scope) later in the project, if necessary.
-
The purpose of the profile photo is for the teaching team to identify you. Therefore, you should choose a recent individual photo showing your face clearly (i.e., not too small) -- somewhat similar to a passport photo. Some examples can be seen in the 'Teaching team' page. Given below are some examples of good and bad profile photos.

-
If you are uncomfortable posting your photo due to security reasons, you can post a lower resolution image so that it is hard for someone to misuse that image for fraudulent purposes. If you are concerned about privacy, you can request permission to omit your photo from the page by writing to prof.
-
Roles indicate aspects you are in charge of and responsible for. E.g., if you are in charge of documentation, you are the person who should allocate which parts of the documentation is to be done by who, ensure the document is in right format, ensure consistency etc.
This is a non-exhaustive list; you may define additional roles.
- Team lead: Responsible for overall project coordination.
- Documentation (short for ‘in charge of documentation’): Responsible for the quality of various project documents.
- Testing: Ensures the testing of the project is done properly and on time.
- Code quality: Looks after code quality, ensures adherence to coding standards, etc.
- Deliverables and deadlines: Ensure project deliverables are done on time and in the right format.
- Integration: In charge of versioning of the code, maintaining the code repository, integrating various parts of the software to create a whole.
- Scheduling and tracking: In charge of defining, assigning, and tracking project tasks.
- [Tool ABC] expert: e.g. Intellij expert, Git expert, etc. Helps other team member with matters related to the specific tool.
- In charge of[Component XYZ]: e.g. In charge of
Model, UI, Storage, etc. If you are in charge of a component, you are expected to know that component well, and review changes done to that component in v1.3-v1.4.
Please make sure each of the important roles are assigned to one person in the team. It is OK to have a 'backup' for each role, but for each aspect there should be one person who is unequivocally the person responsible for it.
Project Phase 2
-
Step 0 : Identify the target user profile and the problem you are solving for the target users
Decide on the project direction (e.g., enhance or morph?)
Document these details in the introduction section of your developer guide.
-
Step 1 : Brainstorm user stories
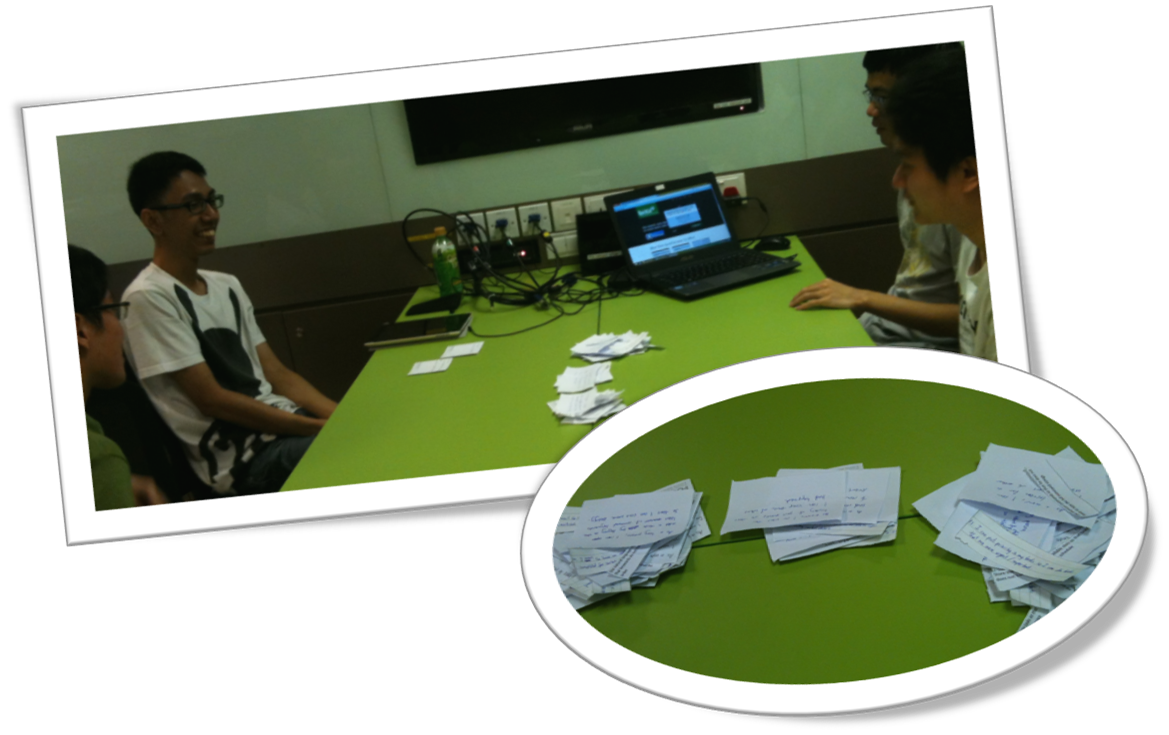
This is a good time to analyze requirements with a view to conceptualizing the next version of the product (i.e. v2.0).
Get together with your team members and brainstorm for user stories for the v2.0 of the product. Note that in the module project you will deliver only up to v1.4 but here you should consider up to v2.0 (i.e. beyond the module).
-
It is ok to have more user stories than you can deliver in the project. Aim to create at least 30 user stories. Include all 'obvious' ones you can think of but also look for 'non obvious' ones that you think are likely to be missed by other teams.
-
Refer [Textbook Specifying Requirements → UserStories → Usage → (section) Tips] for tips on how to use user stories in this task.
-
You can write each user story in a piece of paper (e.g. yellow sticky note, index card, or just pieces of paper about the size of a playing card). Alternatively you can use an online tool (some examples given in [Textbook Specifying Requirements → UserStories → Usage → (panel) Tool Examples ]).
-
Note that you should not 'evaluate' the value of user stories while doing the above. Reason: an important aspect of brainstorming is not judging the ideas generated.
Requirements → Gathering Requirements →
Brainstorming: A group activity designed to generate a large number of diverse and creative ideas for the solution of a problem.
In a brainstorming session there are no "bad" ideas. The aim is to generate ideas; not to validate them. Brainstorming encourages you to "think outside the box" and put "crazy" ideas on the table without fear of rejection.
What is the key characteristic about brainstorming?
Requirements → Specifying Requirements → User Stories →
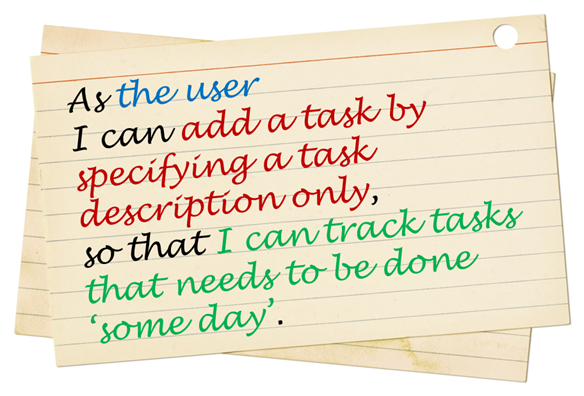
User story: User stories are short, simple descriptions of a feature told from the perspective of the person who desires the new capability, usually a user or customer of the system. [Mike Cohn]
A common format for writing user stories is:
User story format: As a {user type/role} I can {function} so that {benefit}
Examples (from a Learning Management System):
- As a student, I can download files uploaded by lecturers, so that I can get my own copy of the files
- As a lecturer, I can create discussion forums, so that students can discuss things online
- As a tutor, I can print attendance sheets, so that I can take attendance during the class
We can write user stories on index cards or sticky notes, and arrange on walls or tables, to facilitate planning and discussion. Alternatively, we can use a software (e.g., GitHub Project Boards, Trello, Google Docs, ...) to manage user stories digitally.
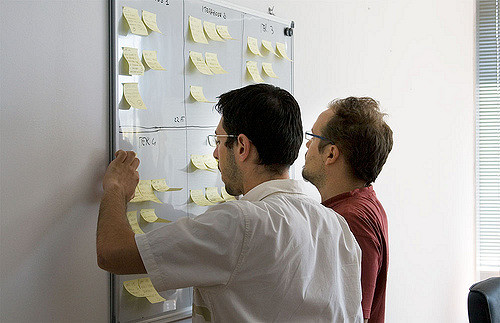
[credit: https://www.flickr.com/photos/jakuza/2682466984/]
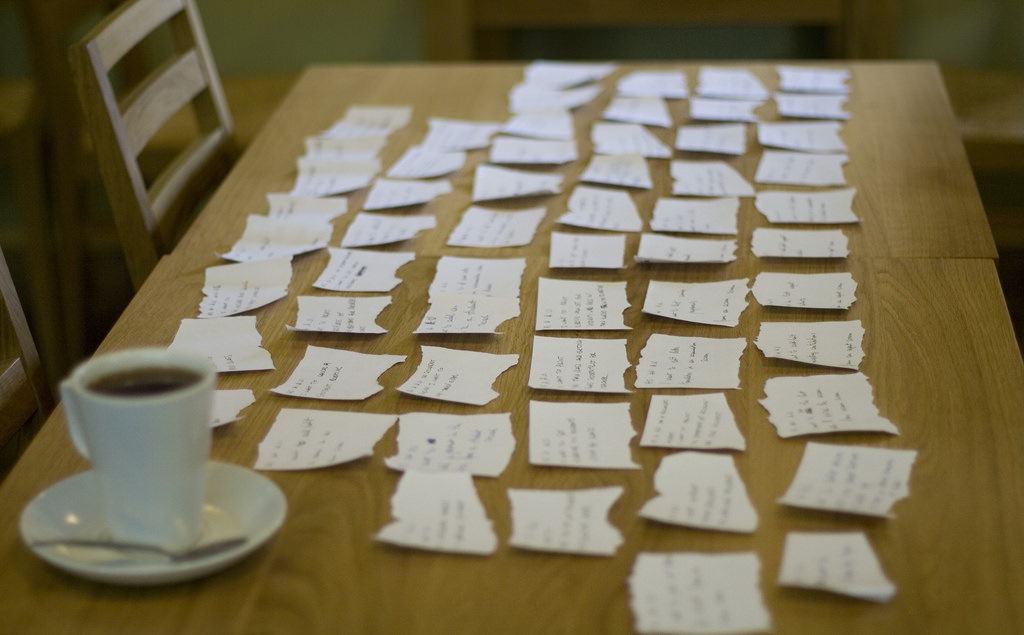
[credit: https://www.flickr.com/photos/jakuza/with/2726048607/]
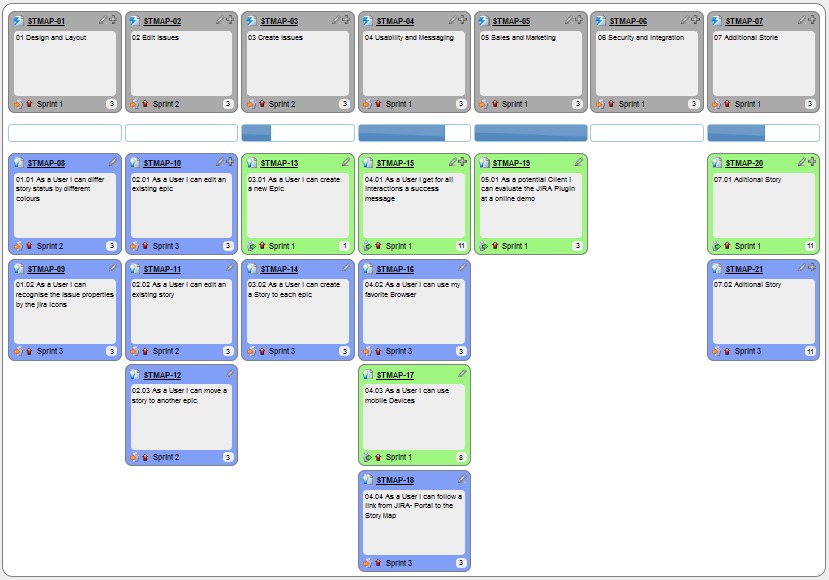
[credit: https://commons.wikimedia.org/wiki/File:User_Story_Map_in_Action.png]
Critique the following user story taken from a software project to build an e-commerce website.
As a developer, I want to use Python to implement the software, so that we can resue existing Python modules.
Refer to the definition of a user story.
User story: User stories are short, simple descriptions of a feature told from the perspective of the person who desires the new capability, usually a user or customer of the system. [Mike Cohn]
This user story is not written from the perspective of the user/customer.
Bill wants you to build a Human Resource Management (HRM) system. He mentions that the system will help employees to view their own leave balance. What are the user stories you can extract from that statement?
Remember to follow the correct format when writing user stories.
User story format: As a {user type/role} I can {function} so that {benefit}
As an employee, I can view my leave balance, so that I can know how many leave days I have left.
Note: the {benefit} part may vary as it is not specifically mentioned in the question.
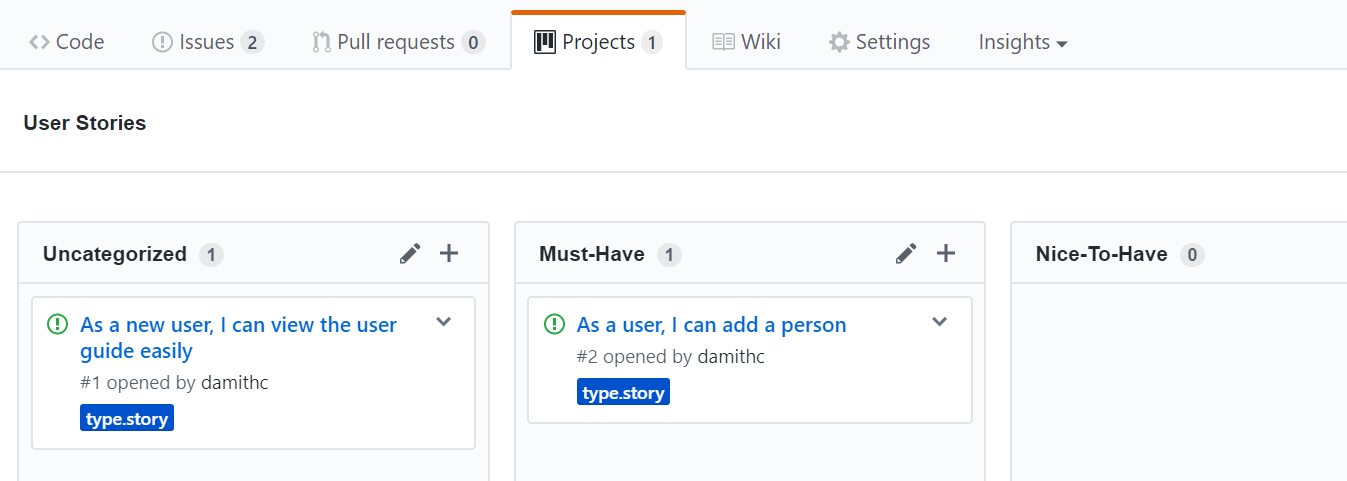
You can create issues for each of the user stories and use a GitHub Project Board to sort them into categories.
Example Project Board:
Example Issue to represent a user story:
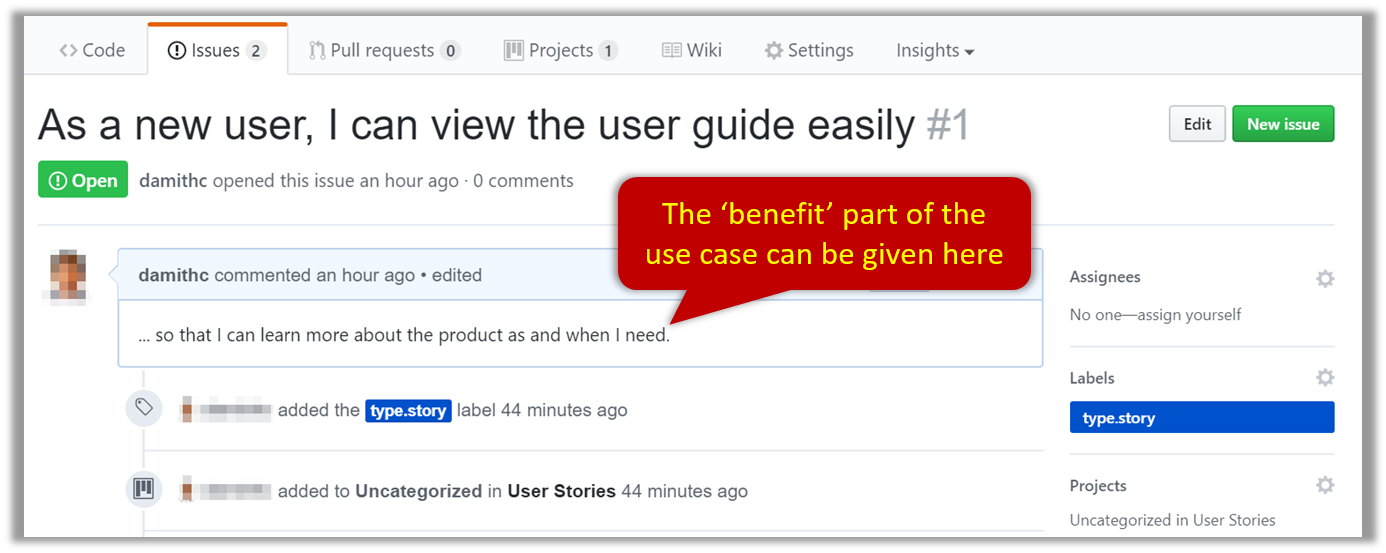
A video on GitHub Project Boards:
Example Google Sheet for recording user stories:

Example Trello Board for recording user stories:

Given their lightweight nature, user stories are quite handy for recording requirements during early stages of requirements gathering.
Here are some tips for using user stories for early stages of requirement gathering:
- Define the target user:
Decide your target user's profile (e.g. a student, office worker, programmer, sales person) and work patterns (e.g. Does he work in groups or alone? Does he share his computer with others?). A clear understanding of the target user will help when deciding the importance of a user story. You can even give this user a name. e.g. Target user Jean is a university student studying in a non-IT field. She interacts with a lot of people due to her involvement in university clubs/societies. ...
- Define the problem scope:
Decide that exact problem you are going to solve for the target user. e.g. Help Jean keep track of all her school contacts
- Don't be too hasty to discard 'unusual' user stories:
Those might make your product unique and stand out from the rest, at least for the target users.
- Don't go into too much details:
For example, consider this user story: As a user, I want to see a list of tasks that needs my attention most at the present time, so that I pay attention to them first.
When discussing this user story, don't worry about what tasks should be considered needs my attention most at the present time. Those details can be worked out later.
- Don't be biased by preconceived product ideas:
When you are at the stage of identifying user needs, clear your mind of ideas you have about what your end product will look like.
- Don't discuss implementation details or whether you are actually going to implement it:
When gathering requirements, your decision is whether the user's need is important enough for you to want to fulfil it. Implementation details can be discussed later. If a user story turns out to be too difficult to implement later, you can always omit it from the implementation plan.
v1.1 Product
Suggested approach to development:
-
First, each member can attempt to do a local-impact change to the code base.
Objective: To familiarize yourself with at least one components of the product.
Description: Divide the components among yourselves. Each member can do some small enhancements to their component(s) to learn the code of that component.
-
Further, each member should try to add some enhancements that are in line with the vision for v2.0. After adding some local-impact changes recommended above, attempt to do some
global-impact enhancements
, touching as many other components as possible.
Submission:
- Create PRs from your own fork to your team repo. Get it merged by following your team's workflow.


